Adding Events to the Calendar
When you press the button labeled "Manage Meetings/Events" on the main page, you will come to a screen with a new list -- the list of scheduled events. It looks something like this:
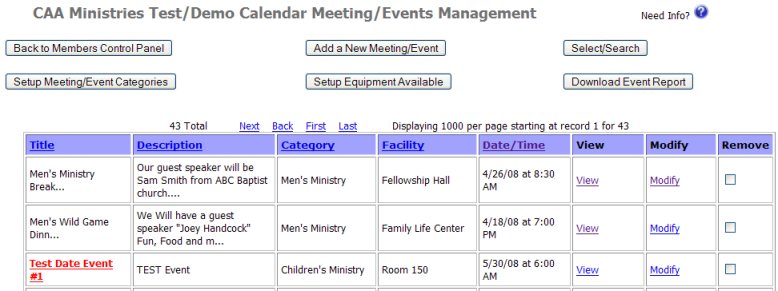
At the top of the page is a row of buttons that perform the tasks of the events program. The two main buttons are Add a New Event and Select/Search the already scheduled events. The buttons in the bottom row allow you to setup event categories and equipment available. The last button is the Download Event Report button which, when pressed, will download an Excel file to your hard disk, containing all the info about events.
The list displays all the events/meetings that have been scheduled.
At first, it will be empty so you might use the button labeled Add a New
Meeting/Event in order to begin the process.
However, it would be well adviseable to use the buttons labeled Setup Categories
and Setup Equipment Available
before you start scheduling events. Categories allow you to assign categories to
events. Example: Church, Sunday School,
Men's Ministry, Women's Ministry, etc, etc.
And the Setup Equipment screen allows you to type in the different equipment you
have available to so that it can be selected when setting up an event.
Once events have been entered, this will be a list of those events. Note that
the title of the fields on the events are show in the blue header line. Such as
Title Description Category Facility Date/Time.
Note that those words are linked. By clicking on the word (such as Category),
you can sort the listing by that field name.
You can also use the Select/Search button to select to view a subset of the
events based upon category, facility, date, etc.
On the listing for each event, you see a View and Modify link. The View link
shows you complete details about the event, while the Modify link alows you to
edit/change the event.
If you see an event title in RED, it means the event was submitted, but not yet
approved. Clicking on the title will show you the status of the approval(s).
The title of some events may appear in GREEN. This means that the event is full
and a waiting list has been established. When you click on the View link for
this event, you will see a button labeled Manage Waiting List, where you can see
who is on the waiting list.
Also, on some events, the date is in dark navy blue. This means it is a
recurring event.
Now, let's look at Adding a New Event.